The Ultimate Checklist for Converting Your Garage into a Home Office: From Start to Ribbon Cutting!

So, you’re thinking about converting your garage into a home office?
A work from home office in your garage? What an exciting project! It’s a fantastic way to create a dedicated workspace without encroaching on your home’s living areas.
Imagine this. Your commute shrinking to just a few seconds walk, and you get to design a space that matches your work style perfectly! No more makeshift desk in the corner of the living room or kitchen table chaos.
Turning a garage into a home office is not just about creating a workspace. It’s about enhancing your work-from-home life. This is your own professional haven.
But before you start picking out paint colors and office chairs, there are some things you have to do first!
We want to present you with a “to the point” list first, so you get an idea of what you’re letting yourself into. A high-level overview of how to transform your garage into a sleek, functional home office. This overview provides a roadmap, but remember, the devil is in the details!
Right below the overview we go straight into the details of each phase, stage and step. Hopefully this will help get you through to completing your dream office when you’re ready!
1. Conceptualization Phase:

By laying down dreams, inspirations, and initial thoughts, you ensure that the project remains personally meaningful and aligned with your desires.
- Vision and Inspiration: Gather visual inspirations to envision the ideal garage office transformation.
- Rough Sketching: Draft initial thoughts through doodles and basic layout sketches.
- Feasibility Check: Balance the dream with practical constraints, such as space dimensions and budget considerations.
- Personal Reflection: Determine the main motivations for the project and consider the desired timeline.
2. Planning Phase:

Proper planning lays the foundation for a seamless transformation.
- Space Evaluation: A garage home office begins with understanding the available space. Measure the garage’s dimensions and note down specific characteristics, like natural lighting or ventilation points.
- Structural Integrity: Ensure that the core structure is sound. This means checking the garage’s walls, ceiling, and floors for damages or potential vulnerabilities.
- Functional Needs Assessment: Jot down what your ideal office should have. Think about desk size, storage areas, technology requirements, and ambiance elements.
- Finalizing the Design and Layout Refinement: Translate your rough designs into something more concrete.
- Challenges and Utility Access: Identify potential challenges, like the need for additional power outlets or internet connections, and plan for their solutions.
- Budget and Timeline Estimation: Set your budget boundaries and draft a timeline. Always account for a contingency budget and possible delays.
3. Execution Phase:
This is where your vision starts to materialize.
- Demolition and Cleanup: Clean out the garage, removing unwanted items and debris to prepare for the transformation.
- Structural Adjustments: Make any required changes to the garage structure, whether it’s erecting partitions or introducing new windows.
- Utility Setup: Ensure you have the necessary power outlets and internet connections. This might require some electrical and networking work.
- Weatherproofing: A garage is typically not as insulated as other parts of a home. Upgrade insulation to ensure comfort in all seasons.
- Interior Construction: Lay down the chosen flooring, paint walls in desired hues, and fix lighting fixtures.
- Tech and Furniture Installation: Bring in your office furniture and set up all the tech essentials.
4. Closure Phase:

The finishing touches to ensure everything is perfect.
- Inspections: Review the entire setup to ensure your garage home office adheres to safety standards and your initial vision.
- Quality Assurance: Test everything. This includes checking power outlets, Wi-Fi strength, and the comfort of your chair.
- Feedback Loop: Seek input from friends or family. Sometimes, a fresh perspective can spot overlooked details.
- Official Inauguration: It might sound silly, but having a little ribbon-cutting event, even if it’s just you and a pair of scissors, gives a sense of accomplishment and closure to the project.
Let us get into the step by step of a garage to home office conversion!
Conceptualization Phase
Vision and Inspiration:
1. Identify Your Needs:
- Start by jotting down what you expect from your garage home office. Do you need a quiet space, ample storage, or a large desk area for drafting?
2. Research Online Platforms:
- Dive into websites like Pinterest, Houzz, and Instagram. They are treasure troves for design inspiration and innovative ideas.
3. Design Magazines and Books:
- Visit a local bookstore or library. Interior design magazines and books can provide not just visual ideas but also insights into materials and layouts.
4. Take Inspiration from Nature:
- Sometimes, the best ideas come from the world around us. Think about the colors, textures, and light in your favorite natural settings and consider how they might influence your space.
5. Visit Local Co-working Spaces:
- If possible, drop by co-working spaces or other professional environments. Notice the design elements that stand out and think about how they could be incorporated into a home setting.
6. Attend Home and Office Expos:
- Such events showcase the latest trends and innovations in home and office design, offering a firsthand look at potential products and styles.
7. Create a Vision Board:
- Collate all the images, fabric swatches, color samples, and any other materials that resonate with you onto a board. This visual representation can serve as a reference throughout the project.
8. Consult with a Designer (Optional):
- If you’re unsure about your direction, a brief consultation with an interior designer can help clarify your vision and offer professional insights.
9. Reflect on Your Current Setup:
- Look at your current workspace. Identify what’s working and what’s not. This self-reflection can guide the transformation more effectively.
10. Set a Preliminary Budget:
- Even in the inspiration phase, it’s a good idea to have a rough budget in mind. It helps in narrowing down choices and setting realistic expectations.
Rough Sketching:
1. Start with Basic Shapes:
- Begin your sketch with basic geometric shapes that represent different elements, such as rectangles for desks or circles for chairs.
2. Identify Key Areas:
- Mark out primary zones like the workstation, storage areas, and potential spaces for tech equipment or plants.
3. Use Grid Paper:
- Grid or graph paper can help keep proportions in check and provide a scaled perspective.
4. Add Annotations:
- Write brief notes next to your doodles. This could include material preferences, potential colors, or even inspirational quotes.
5. Draft Multiple Versions:
- Don’t settle on the first sketch. Experiment with multiple layouts to explore various possibilities.
6. Factor in Natural Light and Traffic Flow:
- Think about how you’ll move around the space. Ensure there are clear paths and no areas where you might feel cramped. Place your workstation or desk considering windows or sources of natural light.
7. Think Vertically:
- Garages often have more vertical space than traditional rooms. Consider tall storage, hanging plants, or even elevated platforms.
8. Use Digital Tools (Optional):
- Software like SketchUp or apps like MagicPlan can help digitize your rough sketches and provide a 3D perspective.
9. Review, Refine, and Seek Feedback:
- Constantly review your sketches, refining them based on new ideas or practical considerations. Share them with a friend or family member for insights.
Feasibility Check:
1. Floor Space Analysis and Revisiting Vision:
- Determine the actual usable area after considering any fixed installations or obstructions. After checking feasibility, ensure that your initial vision and inspiration align with practical considerations.
2. Budget Breakdown and Compare Costs:
- Allocate a rough estimate of how much you’re willing to spend on each stage of the transformation. Research average costs for each aspect of the conversion and compare it with your allocated budget.
3. Prioritize Essentials and Plan for Contingencies:
- List down must-have items or changes and prioritize them over nice-to-have additions. Always reserve a portion of the budget (typically 10-20%) for unforeseen expenses.
4. Material Considerations and Professional Consultation (Optional):
- Identify the types of materials you want (e.g., type of flooring or insulation) and check their prices and availability. For complex tasks, gather quotes from professionals to understand costs and challenges.
5. DIY vs. Professional and Local Regulations:
- Decide on tasks that can be done on your own versus those needing expert intervention. Ensure you’re aware of any local permits or regulations for your planned changes.
6. Timeline Estimation:
- Set a tentative timeline for the conversion of your garage home office, ensuring it aligns with your budget and other constraints.
Personal Reflection:
1. Identify Motivations and Set Goals:
- Understand what drives the need for the transformation. Clearly define the project’s end goals.
2. Establishing Non-negotiables:
- Decide on aspects you won’t compromise on, whether it’s specific equipment, aesthetics, or utilities.
3. Desired Ambiance:
- Determine the mood or atmosphere you wish for the space.
4. Workspace Ergonomics and Traffic Flow:
- Visualize the daily use layout, ensuring efficient movement within the garage home office space.
5. Timeline Reflection:
- Decide on the project’s start and end dates, factoring in personal commitments or seasons.
6. Intended Hours of Use:
- Consider the hours you’d typically spend in the office to guide decisions related to lighting and comfort.
7. Future Adaptability:
- Reflect on the garage home officespace’s potential future adjustments or repurposing.
8. Environmental Impact Consideration:
- Focus on sustainable materials and processes for the renovation.
Planning Phase
Space Evaluation:
1. Clear the Space:
Before taking any measurements, ensure the garage is cleared of all items that could obstruct an accurate reading. This includes moving out cars, decluttering tools, and removing any stored items.
2. Tools and Equipment:
Equip yourself with the necessary tools:
- A retractable measuring tape or laser measure for accuracy.
- A notebook or digital device to record measurements.
- A leveling tool to check floor evenness.
- A flashlight for illuminating dim areas.
3. Measure Dimensions:
- Width and Length: Start by measuring the floor space. Measure the width from one side wall to the other, and the length from the back wall to the garage door. It’s recommended to measure from multiple points to ensure accuracy, especially if the garage is not perfectly rectangular.
- Height: Measure the height in multiple spots – from floor to ceiling – ensuring you note down the lowest and highest points. This is particularly important if you’re considering adding a false ceiling or overhead storage.
4. Natural Lighting:
Identify and measure the size of existing windows or openings. Note their orientation (e.g., north-facing, south-facing) as this can impact the amount of natural light throughout the day.
5. Ventilation Points:
Check for existing ventilation, whether it’s through built-in vents, windows, or gaps. Good ventilation is crucial for maintaining air quality, especially if you’ll spend significant hours in the space.
6. Floor Evaluation:
Use the leveling tool to check the evenness of the floor. Garages may have a slight slope for drainage purposes. Knowing this can influence your decisions about flooring or the placement of furniture.
7. Wall Conditions:
Inspect the walls for any abnormalities like dampness, cracks, or irregularities. This can be vital for later steps involving insulation or wall mounts.
8. Electrical Points:
Even though this isn’t the utility setup phase, it’s good to note down the existing electrical outlets, switches, and their positions during space evaluation. This can help in planning the layout.
9. Document Everything:
Keep a detailed record of all the measurements and findings. This can be in a physical notebook, digital note app, or specialized home renovation software. Pictures can also be helpful; consider taking photos from multiple angles and close-ups of specific features or problem areas.
10. Preliminary Layout Sketch:
Using the measurements and observations, sketch a basic layout of the garage. While this isn’t the final design, it gives a visual representation of the space, aiding in subsequent planning phases.
Structural Integrity Check:
Conducting a thorough structural integrity check ensures that your new home office will be not only functional but also safe. Addressing any potential issues at this early stage can save time, money, and hassle in the long run.
1. Foundation Inspection:
- Examine the foundation for cracks, unevenness, or signs of water damage.
- Look for indications of settling, like doors or windows that no longer align properly.
2. Wall Assessment:
- Check both the interior and exterior walls.
- Look for cracks, particularly those that are horizontal or have a stair-step pattern, as these can be signs of significant issues.
- Examine the walls for dampness or water stains which might indicate a leak or poor waterproofing.
3. Roof and Ceiling Inspection:
- Assess the ceiling for any signs of sagging or water damage.
- If possible, inspect the exterior of the roof for damaged or missing shingles, tiles, or other coverings.
- Check for signs of rot or water damage in the attic space or on the ceiling of the garage.
4. Support Beam and Post Examination:
- Ensure that all beams and posts are straight and free from significant cracks.
- Check for signs of rot or termite damage, especially in wooden beams.
5. Floor Evaluation:
- Even though this was touched upon in space evaluation, from a structural standpoint, ensure the floor doesn’t have significant cracks or uneven settling.
- For garages with a basement or crawl space beneath, check the joists and subfloor for any signs of rot or damage.
6. Drainage System Assessment:
- Ensure that the surrounding area has a good drainage system to prevent water accumulation, which can compromise the foundation.
- If there’s a drain inside the garage, ensure it’s not clogged and functions properly.
7. Professional Consultation:
- While a basic inspection can be done personally, it’s often advisable to have a structural engineer or a professional home inspector take a look for a thorough assessment, especially if you identify potential issues.
- They can provide recommendations for repairs or reinforcements needed before proceeding with the conversion.
8. Document Observations:
- Similar to the space evaluation, maintain a detailed record of all findings.
- Note down areas that need repair or reinforcement, and use this as a guide when planning the next phases.
Functional Needs Assessment:
A meticulous Functional Needs Assessment ensures your new office caters to every facet of your professional life. When a space aligns with both work requirements and personal preferences, it can drastically elevate productivity and well-being.
1. Work Role Analysis:
- Identify the Nature of Your Work: Start by classifying your work: are you a graphic designer, writer, consultant, or something else? Different professions have unique needs in a garage home office.
- Determine Daily Tasks: Enumerate what tasks you usually undertake, like writing, sketching, virtual meetings, etc.
2. Equipment and Technology Audit:
- Current Inventory: List all the equipment you currently own.
- Future Requirements: Think about equipment or tech upgrades you might need in the foreseeable future.
- Placement Planning: Determine optimal locations for each equipment piece, considering factors like accessibility and frequency of use.
3. Space Utilization:
- Zoning: Break the office into zones based on activities, such as a work zone, relaxation zone, and storage zone.
- Work Flow: Think about the flow of your work. For instance, if you print documents often, the printer should be easily accessible from your desk.
4. Storage Evaluation:
- Item Categorization: Classify items into categories like frequently used, occasionally used, and rarely used.
- Storage Solutions: Decide on storage types (cabinets, shelves, drawers) for each category. Remember, accessible storage for frequently used items is vital.
5. Furniture and Ergonomics:
- Desk Evaluation: Do you need a large desk for multiple monitors or drafting? Or would a smaller one suffice?
- Seating: Look into ergonomic chairs that support posture and reduce strain.
- Alternate Seating: Consider a comfortable couch or lounge chair for breaks or reading.
6. Digital and Physical Meeting Considerations:
- Physical Space: If hosting clients or colleagues in your garage home office, ensure there’s enough seating and a dedicated meeting area.
- Digital Setup: For virtual meetings, think about your backdrop, ensuring it’s professional and free from distractions.
7. Connectivity and Power:
- Internet Needs: Assess your bandwidth needs. Streaming and large file transfers might require a higher speed connection.
- Power Points: Plan where each device will be and ensure there’s a nearby power outlet. Consider future additions.
8. Lighting and Vision:
- Task Lighting: Identify tasks that need focused lighting in your garage home office, like reading or sketching.
- Ambient Lighting: Ensure there’s enough general lighting to fill the room without shadows.
- Eye Comfort: Position monitors to reduce glare, considering natural light sources.
9. Personal Comfort Elements:
- Temperature Control: Is there a need for heaters, fans, or an air conditioning unit?
- Air Quality: Consider air purifiers or dehumidifiers, especially if the garage has limited ventilation.
10. Aesthetics and Environment:
- Mood Board: Create a board with colors, textures, and decor inspirations.
- Personal Touches: Plan for personal decor items, artwork, or photos that inspire and motivate.
11. Sound and Privacy:
- Noise Assessment: Determine noise levels at different times of the day. This helps in planning soundproofing or scheduling work hours.
- Privacy Needs: If confidentiality is a concern, think about blinds or curtains for windows.
12. Flexibility and Growth:
- Modular Systems: Opt for furniture and storage that can be easily reconfigured.
- Scalability: Keep in mind how your work might evolve. Will you employ an assistant? Might you require more tech in the future?
13. Review and Feedback:
- Simulate a Workday: Walkthrough a typical day’s activities in your mind, considering each planned element.
- Feedback Loop: Discuss your plans with a colleague, family member, or friend to get an external perspective.
14. Documentation:
- Detailed Checklist: Compile a list of all requirements, preferences, and considerations.
- Prioritize: Rank items in order of importance, which will aid in budgeting and design phases.
Finalizing the Design and Layout Refinement:
A well-thought-out design acts as the foundation for the subsequent stages. It allows for visualization of the end result, minimizing potential hiccups and ensuring that the space serves its intended purpose efficiently and beautifully.
1. Review and Refine Initial Sketches:
- Begin by revisiting the rough sketches from the Conceptualization Phase. Identify what elements resonate most with your vision and which might need reconsideration or final touches. Based on your earlier space utilization insights, designate areas for different activities like the workspace, storage, and relaxation zones.
2. Visualization Tools:
- Utilize digital tools to better visualize and refine your design concept.
- Consider using software like SketchUp, AutoCAD, Floorplanner, or even simpler apps like RoomSketcher. These tools offer both 2D layouts and 3D renderings to provide a holistic view of the space.
3. Integrate Functional Needs:
- Refine the sketches to incorporate your functional needs assessment. This includes ensuring the correct desk size, adequate storage areas, tech provisions like outlets and charging stations, and creating the right ambiance for productivity.
4. Consider Acoustics and Noise Control:
- Given that garages aren’t typically designed with acoustics in mind, it’s crucial to address potential noise issues. Research soundproofing materials, acoustic panels, or even double-glazed windows to ensure a quiet work environment.
5. Incorporate Structural Insights:
- Your design must respect the garage’s structural integrity. This might involve accommodating immovable structural elements, supporting beams, or planning for potential repairs.
6. Plan for Mobility and Flexibility:
- As your work needs evolve, your space should adapt. Consider furniture on casters, adjustable shelving, or modular desk systems that allow for reconfiguration. This ensures longevity for your home office setup.
7. Integrate Tech, Connectivity, and Backup Systems:
- Cable Management: Think ahead about where your devices will be and plan routes for cables that ensure safety and aesthetics. Consider concealed conduits or under-desk trays.
- Device Layout: Strategically place tech devices in accordance with power outlets, Wi-Fi signal strength, and user accessibility. This aids in a seamless work experience.
- Backup Systems: Protect your work and devices. Consider implementing UPS systems for power outages and cloud backups for data security.
8. Security Measures:
- Consider Reinforced Doors and Windows: Exploring sturdier doors and windows could provide an added layer of security against potential break-ins. Multi-point locks and shatter-resistant glass might be options to look into.
- Alarm Systems: Think about integrating a security system tailored to your needs. Motion detectors, door/window sensors, or a blend of both could offer peace of mind.
- Video Surveillance: Setting up cameras can not only deter potential intruders but also help in monitoring your space. It’s worth considering, especially if you’ll store valuable items.
- Secure Storage Options: If you’re planning to keep crucial documents or pricey equipment in the space, a safe or lockable cabinet might be a valuable addition.
- Access Control: Delving into keyless entry systems or smart locks could allow greater control over who accesses the space, blending both convenience and security.
- Exterior Lighting: Illuminating the exterior can act as a deterrent. Motion-sensitive lighting might be an avenue to explore.
- Internet Security: Given the digital nature of most work, ponder over fortifying your digital environment. This might involve reliable antivirus software or even a secure Wi-Fi network.
- Insurance Considerations: It might be worthwhile to check your insurance policy to see if it covers your proposed home office. Adjustments or specific riders might be beneficial for peace of mind.
9. Furniture and Ergonomics Consideration:
- Size and Scale: Ensure the furniture you’re considering fits the space both physically and visually. Also, ensure there’s enough legroom under desks, and shelves are within arm’s reach.
- Ergonomics: Invest in chairs that offer lumbar support, desks at the right height, and ensure that monitors are at eye level to prevent strain.
10. Finalize Material and Color Palette Selection:
- Delve deep into the aesthetics. Choose materials for the desk, flooring, or walls. Settle on a color palette that complements your desired ambiance and aligns with the productivity vibe you want to achieve.
11. Material Sampling and Considerations:
- Material Boards: Create a tactile experience. Pin up samples of materials, from flooring to fabrics. This physical interaction can offer insights that digital renditions might miss.
- Durability and Maintenance: Beyond the aesthetics, ensure your choices can withstand daily use and remain easy to clean and maintain.
12. Lighting and Electrical Considerations:
- Natural Light: Evaluate the existing natural light. Position your workspace to take advantage of this, or consider adding new windows or skylights.
- Artificial Light Placement: Plan the positioning of overhead lights, task lights, and ambient lighting. Think about the type of bulbs, brightness, and even the color temperature for late-night work sessions.
13. Decide on Ventilation and Insulation:
- Garages can be drafty or overly hot. Consider adding insulation to walls and roofs. Think about window placements for natural ventilation or even invest in an HVAC system or a good fan for temperature control.
14. Storage Solutions and Considerations:
- Built-In vs. Freestanding: Ponder over custom cabinets or freestanding shelves. Each has its pros and cons in terms of cost, flexibility, and space utilization.
- Visibility vs. Concealment: Decide what needs to be immediately accessible and what can be stored away. This helps in maintaining a clutter-free environment.
15. Feedback, Reviews, and Iterations:
- Stakeholder Review: Sharing the space? Get their input. Even if not, family members might offer a fresh perspective.
- Professional Consultation: If budget permits, a review from an interior designer or architect can provide invaluable professional insights and might highlight potential oversights.
16. Detailing, Annotations, and Documentation:
- Comprehensive Design Blueprints: Transition from preliminary sketches to detailed, precise drawings that incorporate all elements of your home office design.
- Material Lists and Sourcing: Compile a list of all materials, finishes, and fixtures. This should include specifics like type, color, and even potential vendors or stores. Having a detailed list aids in budgeting and ensures you don’t overlook any element during the purchase phase.
- Annotated Instructions: Especially if you’re planning to DIY or manage the conversion process, include detailed notes or annotations on your drawings. These could be assembly instructions, installation sequences, or even maintenance reminders for certain materials or equipment.
- Digital Backup: In the age of tech, having a digital copy of all your plans is beneficial. It allows for easy sharing with potential contractors, seeking online feedback, or even accessing via a mobile device while shopping for materials.
Challenges and Utility Access:
Tackling potential hurdles and ensuring utility readiness can set the stage for a smooth garage-to-office transformation.
1. Identify Potential Challenges:
- Existing Damage: Check for issues like water damage, mold, or pests that might complicate the conversion.
- Ventilation Issues: Assess the current ventilation; it might not be on par with typical living spaces.
- Natural Light: If there are few windows, consider how to maximize natural light or the feasibility of adding more windows.
- Space Limitations: The garage’s size might require careful space management to fit all office needs.
2. Utility Mapping:
- Existing Outlets: Locate and test current electrical outlets.
- Internet Accessibility: Check Wi-Fi strength in the garage or think about hardwiring an Ethernet connection.
- Water and Plumbing: Determine feasibility if considering a kitchenette or restroom.
- Heating and Cooling: Evaluate the HVAC system’s capability to condition the new office space.
3. Solutions and Alternatives:
- Professional Consultations: Get insights from experts like electricians or contractors.
- Tech Solutions: Consider Wi-Fi extenders for weak areas and surge protectors where more outlets are needed.
- Natural Solutions: Use mirrors to boost natural light or add plants that do well in dim settings.
4. Regulations and Permissions:
- Building Codes: Ensure any utility changes align with local codes.
- Permits: Identify if permits are needed for your planned changes.
Budget and Timeline Estimation:
Forming a clear budget and timeline helps mitigate unforeseen expenses and prevent delays.
1. Define Scope of Work:
- List All Tasks: Jot down every task, even seemingly minor ones.
- Prioritize: Ascertain which tasks are vital and which can be optional if budget issues arise.
2. Itemized Budgeting:
- Materials Estimate: Tally costs for all materials, from construction items to office equipment.
- Labor Costs: If hiring experts, get several quotes to understand the going rate.
- Contingency Fund: Set aside 10-20% of your budget for unexpected expenses.
- Utility Setup: Factor in costs for utility upgrades or installations.
- Permit Fees: Account for costs if any permits are required.
3. Timeline Estimation:
- Task Duration: Allocate a realistic timeframe to each task.
- Sequencing: Understand which tasks must precede others.
- Buffer Time: Add in extra days between key tasks for any surprises.
- Milestones: Establish clear markers, such as “Walls finished” or “Furniture arranged.”
4. Monitor and Adjust:
- Track Spending: Regularly compare your actual vs. budgeted costs.
- Timeline Checks: Assess the project’s pace against the projected timeline.
5. Software and Tools:
- Budgeting Tools: Software like Excel or Google Sheets can help organize expenses.
- Project Management Tools: Use platforms like Trello or Asana to stay on schedule.
6. Review and Feedback:
- Mid-point Check: Reevaluate halfway through to adjust for the project’s remainder.
- Seek Expert Opinion: Talk to someone who’s done a similar project for additional insights.
Taking a systematic approach with budget and timeline estimation sets a firm foundation for your project.
Execution Phase
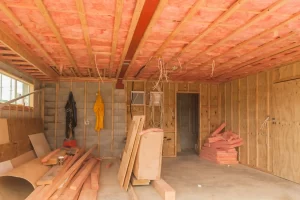
Demolition and Cleanup:
Taking a comprehensive approach to “Demolition and Cleanup” ensures safety and efficiency. Properly identifying and managing potential hazards like mold or asbestos is critical. Moreover, deciding on the flooring ahead of time will guide you in the prep work needed for that specific type.
1. Inventory & Sorting:
- Identify what’s currently stored in the garage.
- Categorize items: those to be discarded, donated, or retained.
- Set aside a dedicated area for each category to maintain organization.
2. Fixture Removal:
- Evaluate the state of current fixtures like shelves, lights, or electrical installations.
- Carefully remove what won’t be incorporated into the new design.
- Securely turn off and disconnect any electrical components before removal.
3. Wall Examination and Prep:
- Before any demolition, check walls for structural soundness.
- Identify potential hazards like asbestos or black mold.
- Mark areas that might require repair or reinforcement.
- If dealing with asbestos or mold, consider hiring professionals or ensure proper safety protocols.
- If removing any sections, do so cautiously, ensuring safety first.
4. Flooring Analysis:
- Examine the existing floor for damage, cracks, or unevenness.
- Decide if there’s a need for leveling before adding a new floor type.
- Consider if epoxy, tiles, carpet, or other flooring types will be applied.
- Evaluate the underlayment condition for potential moisture or mold issues.
- Choose appropriate flooring solutions depending on usage: epoxy for heavy-duty or moisture-prone areas, carpet for a cozier feel, tiles for easy maintenance, etc.
5. Hazardous Material Management:
- Identify any hazardous materials in the garage, like paints, solvents, or old batteries.
- Follow local guidelines for disposal of hazardous waste.
- Ensure proper ventilation when handling chemicals to prevent inhalation of toxic fumes.
6. Safety Precautions:
- Always wear safety equipment: hard hats, gloves, safety goggles, and dust masks.
- Ensure the space is well-ventilated if using any chemicals or solvents.
- Switch off main power when working with electrical installations.
- Use protective gear or masks specifically designed for mold or asbestos if handling them without professional aid.
7. Debris Management:
- Accumulate debris in designated areas, ensuring it doesn’t become a tripping hazard.
- Consider renting a dumpster if a large amount of waste is anticipated.
- Recycle materials wherever possible or dispose of them according to local guidelines.
8. Final Cleaning:
- After debris is removed, conduct a thorough cleaning.
- Sweep, vacuum, and, if necessary, mop the area.
- Walls should be cleaned and prepped, especially if painting or paneling is next on the agenda.
Structural Adjustments:
1. Partition Installations:
- Erect walls or dividers if the design calls for distinct areas or rooms within the garage.
- Implement soundproofing between partitions if required, especially for spaces like meeting rooms or recording studios.
2. Window and Door Installations/Adjustments:
- Install or adjust windows as per the design specifications, prioritizing natural light.
- Modify or install new doors, especially if creating separate spaces.
- Consider skylight installations for additional ambient light, if feasible and present in the design.
3. Floor Adjustments:
- Level out the garage floor to rectify any irregularities.
- Inspect and prepare the subfloor, ensuring it’s suitable for the final floor type.
- Lay down the chosen floor material, whether it’s laminate, hardwood, carpet, or another option.
4. Ceiling Adjustments:
- Adjust the ceiling height if the design demands varied heights.
- Make sure the provisions for lighting fixtures are set in place prior to finalizing the ceiling structure.
5. Safety Protocols During Adjustments:
- Ensure all workers wear the necessary safety gear, including helmets, gloves, and goggles.
- Clearly mark active work zones and ensure all tools are safely stored after use.
6. Addressing Unforeseen Complications:
- Halt work and evaluate any unexpected issues immediately.
- Seek advice from specialists or structural engineers for complex problems.
- Modify the execution plan if necessary, with a focus on safety and maintaining structural integrity.
Utility Setup:
Proper utility setup is vital in turning the garage into a seamless extension of your home, complete with modern conveniences. Ensuring each utility functions optimally is paramount to creating an efficient, comfortable, and productive office environment.
1. Electrical Installation:
- Establish dedicated circuits for office equipment, preventing overloads and ensuring safety.
- Install surge protectors to safeguard equipment against power fluctuations.
- Set up additional outlets based on the finalized design, ensuring convenient access for all devices.
2. Internet Connectivity Setup:
- Install the chosen connectivity method, be it wired or wireless.
- Set up dedicated Ethernet connections if chosen during the design phase for tasks like video conferencing.
- Install WiFi boosters or mesh systems as required to ensure a strong signal throughout the garage.
3. Phone Line Configuration:
- Route the phone cables as per the design.
- Set up the chosen telephony system, such as VoIP, ensuring clear reception.
- Position phone sets or docks based on the workspace layout, ensuring ergonomic accessibility.
4. Climate Control Implementation:
- Integrate the garage with the existing HVAC system or install separate heating/cooling units as decided.
- Set up smart thermostats, if chosen, for automated temperature control.
5. Water and Plumbing Setup:
- Install necessary plumbing lines for any kitchenette or restroom additions.
- Position and connect water heaters as per the design, ensuring efficient operation.
- Set up drainage systems, ensuring they function effectively to prevent water logging or backflow.
6. Backup Power Installation:
- Place and connect Uninterruptible Power Supplies (UPS) for critical equipment.
- Install the chosen backup generator, ensuring it has proper ventilation and safe positioning.
7. Smart Home Device Integration:
- Install any chosen smart home devices such as voice assistants, cameras, or sensors.
- Ensure that they are well-integrated with the central hub and test their functionality.
- Make any final adjustments to optimize the operation of these devices within the workspace.
Weatherproofing:
Remember, while weatherproofing ensures comfort in varying climatic conditions, it also has the added benefit of energy savings, especially if the space is to be air-conditioned or heated. Proper insulation reduces the load on heating and cooling systems, leading to reduced energy bills.
1. Assessment of Current Insulation:
- Conduct a thorough check of the existing insulation to determine areas of improvement.
- Use thermal imaging or an infrared thermometer to detect cold or heat leaks.
2. Sealant Application:
- Seal any gaps or cracks in the walls, roof, or flooring to prevent drafts and moisture penetration.
- Use weatherstripping around doors and windows to ensure a tight seal.
3. Roof Insulation:
- If not already insulated, consider adding insulating material to the roof. Options include spray foam, batt insulation, or rigid foam boards.
- Ensure proper ventilation to prevent condensation and mold growth.
4. Wall Insulation:
- Depending on the wall type, choose between batt insulation, blown-in insulation, or foam board.
- Ensure any electrical outlets or switches on external walls are properly insulated to avoid heat loss.
5. Floor Insulation:
- Consider adding insulation beneath the flooring, especially if the garage is directly over an unheated space or the ground.
- Popular options include rigid foam boards or spray foam insulation.
6. Window Treatments:
- Install double or triple-pane windows to enhance thermal insulation.
- Use thermal or blackout curtains to regulate temperature and prevent UV light from fading interior furnishings.
7. Door Upgrades:
- If the garage has a large door, consider replacing it with an insulated variant.
- Ensure the door’s seals are in good condition or consider replacing them.
8. Ventilation Improvements:
- Install vents or exhaust fans to control humidity and prevent mold or mildew.
- Ensure that any ventilation systems don’t compromise the insulation integrity.
9. Monitoring and Maintenance:
- Periodically check the insulation, especially after extreme weather conditions, to ensure its efficiency.
- Replace or repair any worn-out or damaged insulation materials promptly.
Interior Construction:
Each step in the interior construction process plays a crucial role in ensuring the final space is both functional and aesthetically pleasing. Proper sequencing ensures that each task is executed efficiently, without compromising the quality of the subsequent steps.
1. Floor Preparation:
- Remove any existing flooring if not suitable for the intended use.
- Ensure the floor is level; if not, apply a self-leveling compound or consider professional leveling.
- Clean the surface to remove any debris, dust, or residue.
2. Flooring Installation:
- Depending on the chosen type:
- Carpet: Stretch and secure the carpet. Ensure the underlay is suitable for the type of carpet.
- Laminate or Hardwood: Start from one corner and work towards the exit. Ensure appropriate spacing for expansion.
- Tiles: Begin from the center or a reference line, and ensure tiles are evenly spaced and level.
- Epoxy: Mix the resin and hardener, apply evenly, and allow sufficient time for curing.
3. Wall Preparation:
- Fill any holes or cracks in the walls with a suitable filler.
- Sand the walls lightly to ensure a smooth finish.
- Clean the walls to remove dust or grease. A mild detergent can be effective.
4. Painting:
- Start by applying a primer, especially if you’re making a significant color change or painting over a dark hue.
- Once the primer is dry, start painting from the edges (cutting in) and then fill in the center. Use painter’s tape for clean edges.
- Apply multiple coats if necessary, ensuring each coat is dry before the next application.
5. Ceiling Consideration:
- If the ceiling needs a refresh, paint it before the walls to prevent drips or spills onto the newly painted walls.
- Consider installing a dropped ceiling or acoustic tiles if you require enhanced sound insulation.
6. Lighting Fixtures:
- Ensure the power is turned off at the circuit breaker before beginning any electrical work.
- Remove old fixtures if they are being replaced.
- Install new fixtures according to manufacturer’s instructions.
- Test the fixtures before finalizing their installation to ensure they work correctly.
7. Trims and Finishings:
- Install baseboards, crown molding, or any other architectural details to enhance the interior.
- Paint or stain trims as necessary, preferably before installation to avoid drips on the floor or walls.
8. Final Inspection:
- Walk through the entire space and inspect for any imperfections or missed spots.
- Ensure all fixtures work correctly, and there are no safety hazards.
- Clean up: Remove any protective coverings, tape, or debris. Vacuum or mop the floor and wipe down surfaces.
Tech and Furniture Installation:
Setting up tech and furniture in a home office should ensure not just functionality but also comfort. A well-organized space can greatly enhance productivity and reduce potential health issues related to prolonged work sessions.
1. Furniture Layout Planning:
- Refer to the design blueprint or floor plan to determine the best positioning for each furniture piece.
- Measure spaces and ensure pathways are clear and ergonomic.
2. Assembly and Placement of Furniture:
- Assemble desks, chairs, cabinets, and shelves, following manufacturer’s instructions.
- Position the furniture according to the layout plan, ensuring there’s ample space for drawers and cabinets to open.
3. Computer and Peripheral Setup:
- Position the computer in a location that minimizes glare on the screen.
- Connect peripherals such as keyboard, mouse, printer, and scanner.
- Ensure cables are organized using cable ties or management systems to avoid clutter.
4. Networking and Internet Configuration:
- Set up the router in a centralized location for optimal Wi-Fi coverage.
- Connect all devices to the network, ensuring they have internet access.
- Set up a secure Wi-Fi password and consider creating a guest network for visitors.
5. Additional Tech Gear:
- Install webcams or microphones if they are separate from your computer setup.
- Set up any specialized tech like drawing tablets, 3D printers, or other industry-specific devices.
6. Software and App Installations:
- Ensure your operating system and all drivers are up-to-date.
- Install necessary software programs, such as office suites, design software, or task management tools.
- Ensure security software, like antivirus or firewall programs, is installed and updated.
7. Lighting Adjustments:
- Set up task lighting, such as desk lamps, to ensure ample lighting in work areas.
- Adjust monitor brightness and contrast to be in harmony with the room’s lighting, reducing eye strain.
8. Personalization and Ergonomics:
- Adjust chair and monitor height for an ergonomic setup, ensuring the top of the monitor screen is at or slightly below eye level.
- Place personal items, like photos or artwork, to make the space more inviting.
- Add plants or other decorative items for a touch of nature and aesthetic appeal.
9. Audio and Video Setup:
- If using external speakers, position them for optimal sound distribution.
- Test video conferencing tools to ensure the camera angle is appropriate and the audio is clear without echoes.
10. Storage and Organization:
- Organize office supplies in drawers or containers.
- Set up a filing system, whether it’s physical (cabinets) or digital (cloud storage), to manage documents efficiently.
11. Final Testing and Tweaking:
- Turn on all devices and test for functionality.
- Make any necessary tweaks to the setup for comfort and efficiency.
- Do a mock work session to identify any disruptions or discomforts.
Closure Phase
Inspections:
Review the entire setup to ensure it adheres to safety standards and your initial vision.
1. Safety Compliance Review:
- Conduct a thorough audit focusing on the safety aspects of the entire office space.
- Check for exposed wires.
- Ensure electrical setups adhere to standards.
- Verify safety measures for any tools or machinery present.
2. Functional Assessment:
- Test all electrical outlets.
- Ensure tech devices operate correctly and connect as intended.
3. Aesthetic Evaluation:
- Compare the final setup with the initial design concept.
- Confirm that colors, furniture, and décor match the envisioned concept.
4. Ventilation and Lighting Review:
- Confirm HVAC system functionality.
- Assess lighting quality during various times of the day.
5. Feedback Collection:
- Solicit opinions from trusted individuals.
- Use their feedback to identify areas for potential improvement.
6. Final Documentation:
- Document any deviations from the original plan.
- Produce a report detailing completed work and including any relevant warranties or manuals.
7. Post-Construction Clean-up:
- Thoroughly clean the workspace.
- Additionally Dust, vacuum, and wipe down all surfaces.
Quality Assurance:
1. Outlet Testing:
- Plug a device, like a lamp or a phone charger, into every power outlet to ensure they’re all operational.
- Listen for any unusual noises or see if any sparks appear, as these are clear indications of issues.
2. Wi-Fi Signal Strength Test:
- Move around the garage with a device connected to Wi-Fi.
- Use a network testing app or simply watch a video to see if the signal drops or buffers.
3. Ergonomics Check:
- Sit in your chair for an extended period. Adjust its height, backrest, and armrests.
- Ensure that when you sit, your feet are flat on the ground and your knees are at a 90-degree angle. The top of your computer screen should be at or just below eye level.
4. Lighting Evaluation:
- Turn on all the lights at different times of the day.
- Ensure there’s no excessive glare on your computer screen. Adjust the position or intensity of lights if necessary.
5. Acoustic Assessment:
- Listen for any echo or unusual sounds.
- If the garage space seems too echoey, consider adding some soft furnishings or acoustic panels.
6. Ventilation Verification:
- Check the airflow in the room. Ensure that HVAC systems or fans circulate air adequately without creating too much noise.
7. Security Check:
- If you’ve installed any security devices, like cameras or alarms, test their functionality.
- Ensure doors lock securely and windows close tightly.
Feedback Loop:
1. Invite Friends and Family:
- Schedule a day or two where you invite over a few close friends or family members to your newly transformed home office.
2. Tour the Space:
- Give them a guided tour explaining the layout, the tech setup, and any other features. This often prompts immediate feedback.
3. Practical Test:
- Let them sit at your desk, use the computer, and move around the space. Ask them how comfortable they feel.
4. Questionnaire or Feedback Form:
- Prepare a short list of questions regarding comfort, functionality, aesthetics, and any improvements they’d suggest. This structured approach might help capture more detailed feedback.
5. Act on Constructive Criticism:
- While all feedback is valuable, prioritize feedback that aligns with your vision and adds value to the space’s functionality.
6. Simulate a Workday:
- Ask someone to spend a few hours simulating a regular workday. This will help identify any issues that might only be apparent during actual use.
7. Check for Technical Comfort:
- Ask them to connect their devices to your Wi-Fi, use your printer, or connect to any other tech you have. This can help you identify any user-friendliness issues.
8. Final Touches:
- Based on the feedback, make any final adjustments or additions to the space to ensure it’s both functional and comfortable.
Official Inauguration:
1. Pick a Date:
- Choose a special date for the inauguration. It could be a weekend or even coincide with the date you began the project, marking its completion.
2. Invite Your Supporters:
- While it can be a small, personal event, consider inviting those who’ve provided feedback or support during the transformation process.
3. Prepare the Space:
- Clean and tidy up your home office one last time before the inauguration, ensuring everything is in its place.
4. Ribbon-Cutting Setup:
- Firstly, get a decorative ribbon and a pair of scissors. Set them up at the entrance of the office or across your desk.
5. Acknowledgements:
- Before cutting the ribbon, take a moment to acknowledge your effort and the support you’ve received, be it from professionals, friends, or family.
6. The Big Moment:
- Then cut the ribbon! This symbolic act signifies the official opening of your new home office.
7. Capture the Moment:
- Consider taking a photo or video to commemorate the occasion. It will be a fond memory to look back on.
8. Celebratory Treat:
- Have a little treat for yourself, be it a favorite beverage, dessert, or even ordering in your favorite meal.
9. First Official Work Session:
- After the celebration, take out some time to have your first official work session in your new office. It’ll give you a sense of how the days ahead will be.
10. Reflect:
- Finally at the end of the day, take a moment to reflect on the journey, acknowledging the challenges you’ve overcome and the lessons learned along the way.